Get started
Five minutes, no model, no network, no cost: run the example loop, steer it from the board, then point the board at your own repositories.
You need the loopcaptain command: Installation.
1. Write the example loop
loopcaptain demo
This writes a small loop into ~/.local/share/loopcaptain/demo and puts
it on the board. The loop builds a dashboard on loop engineering with
invented content and comes with two rounds of history.
2. Start the board
loopcaptain serve
Open the address serve prints in a browser. The board answers on this
machine only, and to a browser that opened that address.
3. Steer the loop
- Open the loop. You see its brief, the graph of a round and the two rounds it has behind it.
- Press Start and tick the box. The board runs the one command the
loop declares in its own
loop.json; the tick is asked once per command. - The loop asks a question. Answer it with one of its buttons, or in your own words.
- It reads your answer at its next round, converges and ends
donewithin a minute.
A question looks like this, here from an invented loop:
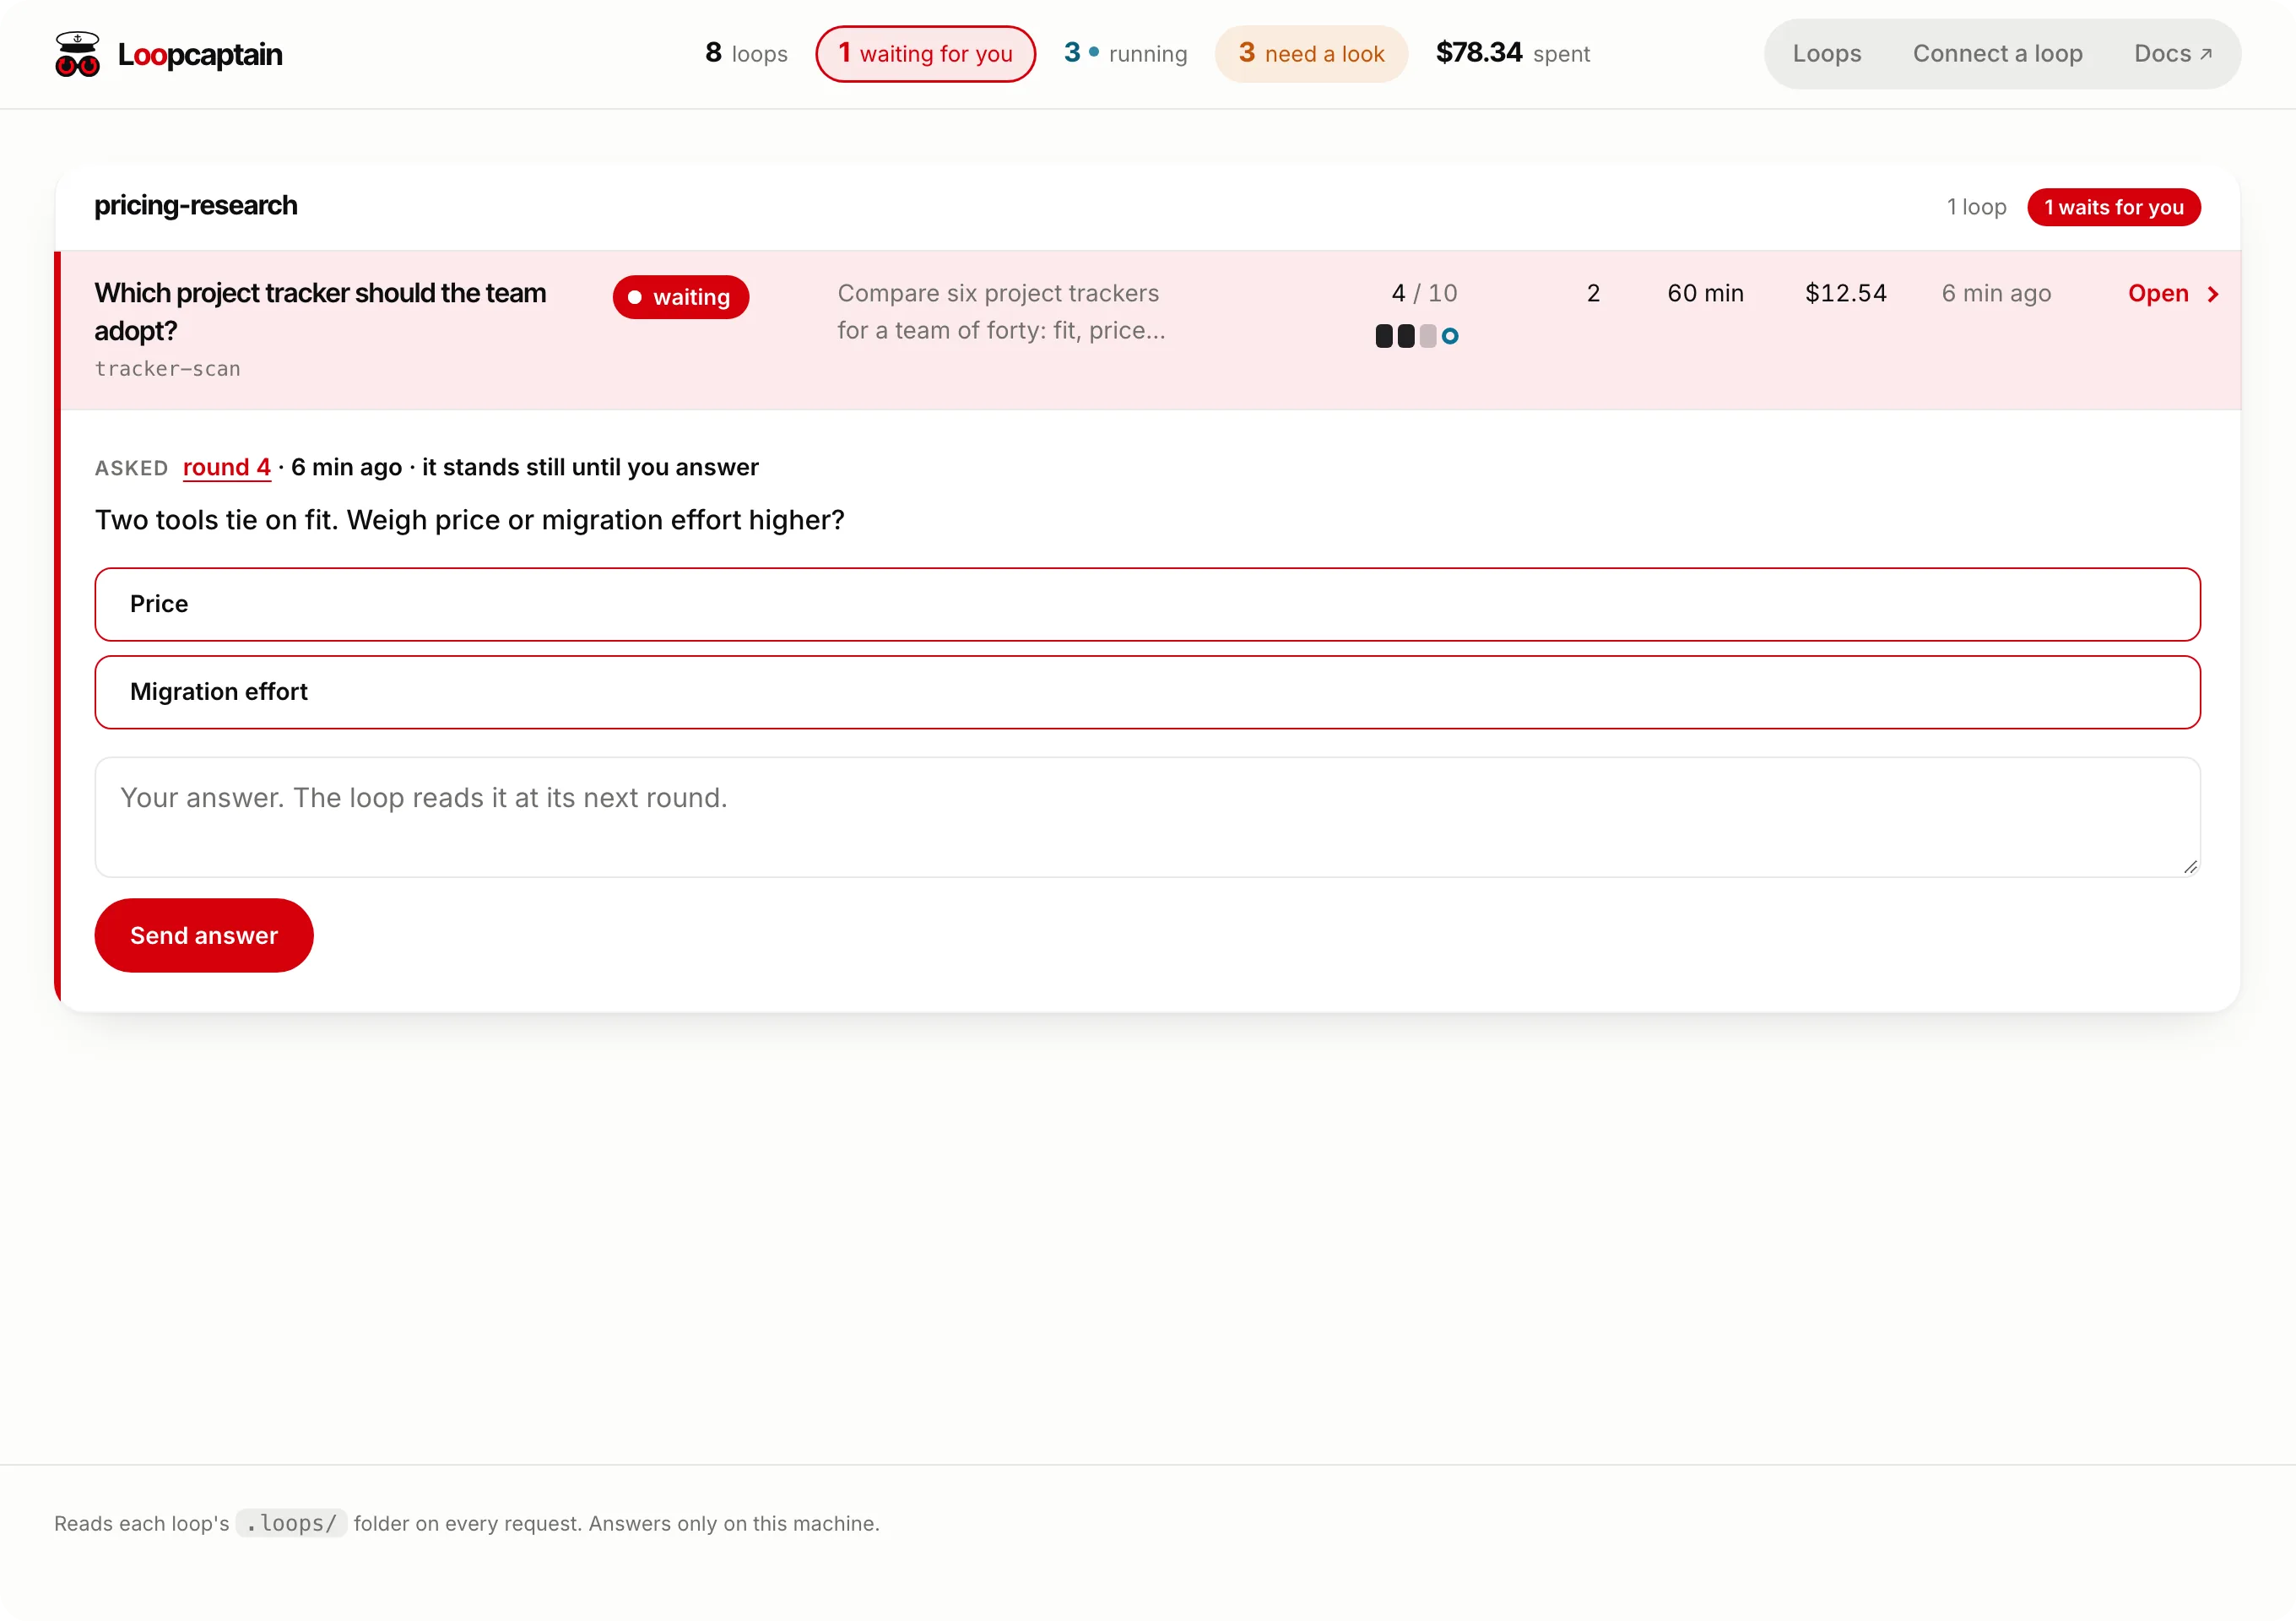
That is everything a connected loop does: it says what it is, what happened and what it needs from you, and it reads what you send.
4. Watch your own repositories
loopcaptain watch ~/projects --root     # every repository under a folder
loopcaptain watch ~/projects/some-repo  # one repository
A repository shows up once it has a .loops/ folder. Watch only
repositories you have read: Start runs what they declare.
Setup has the details.
5. Connect a loop
Give your coding agent one of the two prompts on the home page, or follow Connect or build a loop yourself.
From a checkout
make setup && make demo && make serve
make demo writes the example into demo/ in the checkout.